Harvest and Inventory Storage Locations > Harvest operation > Recording a harvest operation
Looking for something specific in the page and not quite sure where to find it? You can always press CTRL + F on your keyboard and type a keyword. Or you can do a search (in the top right corner).
Recording a harvest operation
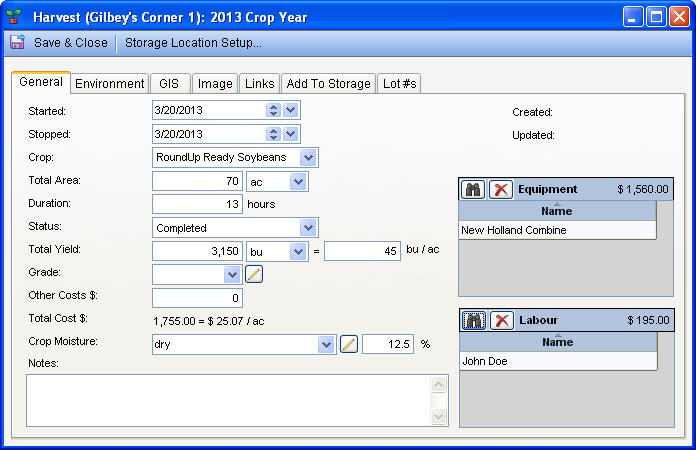
The Harvest dialogue box is used to record harvest operations, including the allocation of the harvested crop into your storage location(s).
To ensure that your profit and loss reporting is accurate, you must enter the equipment and labour information in the harvest dialogue box. To ensure that your inventory on hand is reported accurately, you must allocate your harvested crop into the storage location(s).
Set up your equipment and labour with a realistic usage cost before entering your harvest operation. You can harvest a crop that wasn’t planted, as well as multiple crops from one land area in the same crop year. This is useful for harvests with multiple by-products, such as harvesting wheat and then straw bales on the same land.
Adding a harvest operation:
- Select your land from the land tree on the main menu.
- Select Harvest a Crop from the Records menu or click the
 icon.
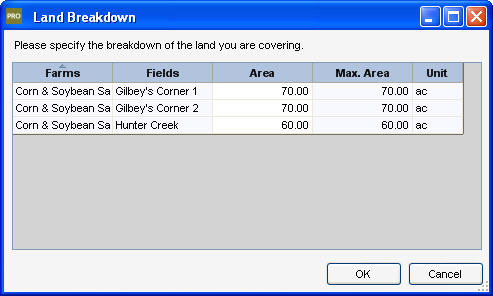
icon. - The Land Breakdown dialogue box appears if your harvest is on more than one piece of land or on land that spans multiple quarters. Specify the land breakdown for the harvest you’re entering. An accurate breakdown is necessary to produce accurate crop insurance seeding and production reports.
- Select the General tab and enter the required information.
- Select the Environment tab and enter the information. This information is optional.
- Select the Add to Storage tab and enter the information. This information is optional.
- Select the GIS tab to add GIS co-ordinates for your harvest. This information is optional.
- Select the Image tab to add an image for your harvest.
- Load the image and/or draw your own sketch. This information is optional.
- Select the Links tab to add file links to your operation. This information is optional.
- Click Save & Close.
Editing a harvest operation:
- Select the land with the harvest operation from the land tree.
- Double-click the harvest operation or click the
 icon.
icon. - Select the General tab and make your changes as needed.
- Select the Environment tab and make your changes as needed. This information is optional.
- Select the Add to Storage tab and make your changes as needed. This information is optional.
- Select the GIS tab to edit the GIS co-ordinates for the harvest. This information is optional.
- Select the Image tab to edit the image for the harvest.
- Load the image and/or draw your own sketch. This information is optional
- Select the Links tab to add file links to your operation. This information is optional.
- Click Save & Close.
Deleting a harvest operation:
- Select the land with the harvest operation from the land tree.
- Select the operation.
- Press the delete key on your keyboard, click the
 icon or open the harvest record and clickDelete.
Last updated on August 25, 2014 by FCC AgExpert