Set-up and creating data files > Software Preferences > Using the cheque designer
Looking for something specific in the page and not quite sure where to find it? You can always press CTRL + F on your keyboard and type a keyword. Or you can do a search (in the top right corner).
Using the cheque designer
The cheque designer has repositionable fields that work with most pre-printed letter-size cheque templates. To open the cheque designer, click Add or Edit from the Cheques dialogue box.
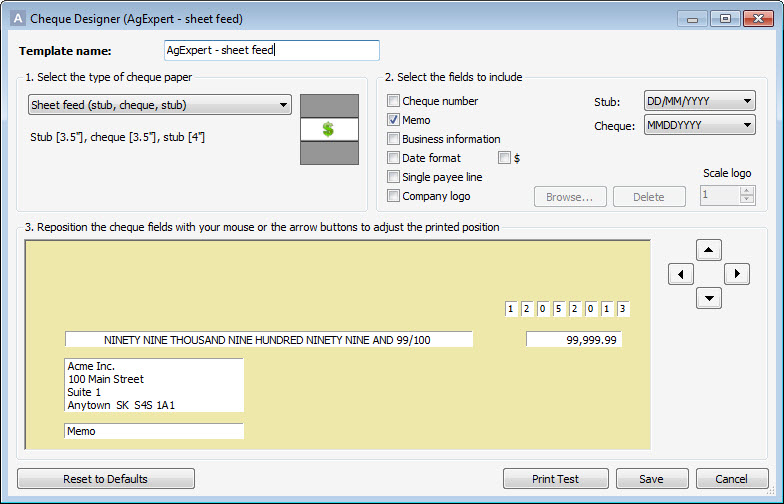
To design a cheque template:
- Enter the Template name.
- Select the type of cheque paper from the drop-down menu. If you change the paper type, the field positions will reset to the defaults for that type.
- Select the fields to include on the template. They’ll appear in the yellow design canvas.
-
Note: If you select Company logo, click Browse to find and upload an image.
- Select the date format from the Cheque drop-down menu.
- Select Date format to choose how the format (DDMMYYYY, etc.).
-
Note: You can reposition the fields in the design canvas by:
- using your mouse to click and drag a field
- clicking a field and then using the arrow keys on your keyboard
- clicking a field and then using the arrow buttons below the design canvas
- Click Reset to Defaults to reset the fields to the defaults for the chosen paper type.
- Use the Scale logo tool to change the size of the company logo field. Enter a ratio between 1and 300 or use the arrows to change the ratio an increment at a time. This option is available when Company logo is selected and you’ve uploaded an image.
- Click Print Test to print a test cheque. You may have to reposition the fields and print a few test cheques before the template is aligned.
- Click Save.
Last updated on August 19, 2014 by FCC AgExpert