Setup > Configuring your cheques > Using the Cheque Designer
Using the Cheque Designer
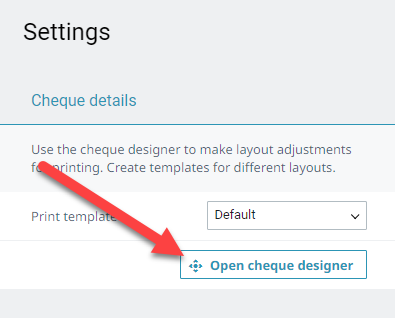
The cheque designer can be used to move fields and update configuration settings for your printed cheques. You can access the cheque designer by going to Purchases > Transactions, or Payroll > Transactions. Click Settings.
The settings window will open from the right. Click Open cheque designer.
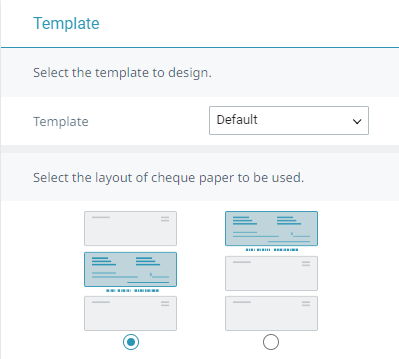
The designer is split into 2 columns. On the left are your configuration settings. This column is set in 3 different sections.
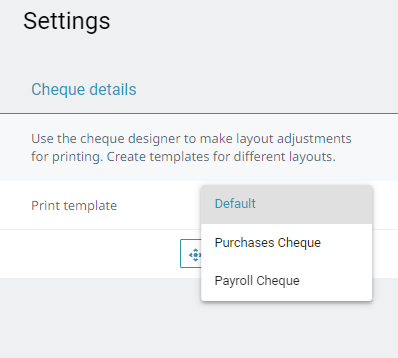
The Template box is used to tell the designer which template you are editing (if you have multiple), and the cheque paper layout. You can select to have your cheque at the top or in the middle, depending on what your cheque paper looks like.
The Background box is used to assist with lining up your fields. You can upload an image of your cheque, either using a picture or a scan. The format must be a picture format (.jpg is the most common). Uploading a cheque image will overlay the image in the column on the right.
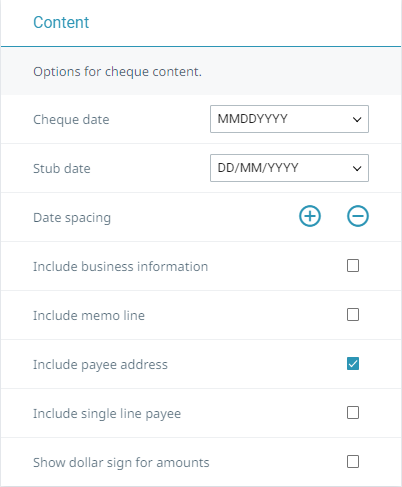
The Content box is used to customize the information that will appear on the cheque. You can update the date format, include business information, memo line, payee address, and a single payee line, or add a dollar sign to the cheque amount.
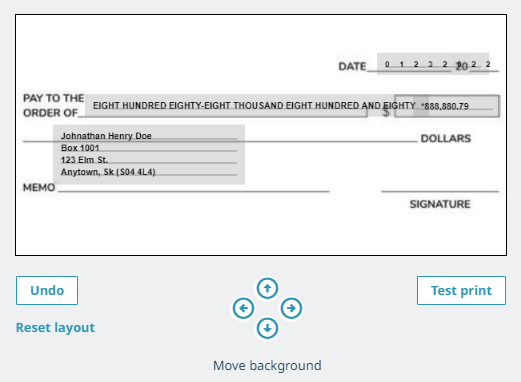
The right column is your layout preview. This screen will allow you to see the changes the settings on the left have made. This area also allows you to move fields as needed, either by using your mouse or by clicking on the field and using your arrow buttons.
The Undo button will undo the last change you made to the layout.
The Reset layout button will reset the template to its default state, undoing all changes you made.
The Test print button will print the template with fake information onto a sheet of paper that you can use to check for alignment.
The Move background arrows are used to move the uploaded background image to centre it if needed.
Once you have created your template, you can click Save as a new template (if this is a new template) or Save (if this is an existing template).

You can create as many cheque templates as you need. You can have a different template for regular purchases and payroll – simply go to the settings screen on each page and set the template you want to use.
Last updated on May 6, 2022 by FCC AgExpert