Inventory and AgriStability > Detailed inventory manager > Using the Detailed Inventory Manager
Looking for something specific in the page and not quite sure where to find it? You can always press CTRL + F on your keyboard and type a keyword. Or you can do a search (in the top right corner).
Using the Detailed Inventory Manager
Use the Detailed Inventory Manager to manage and review your inventory accounts.
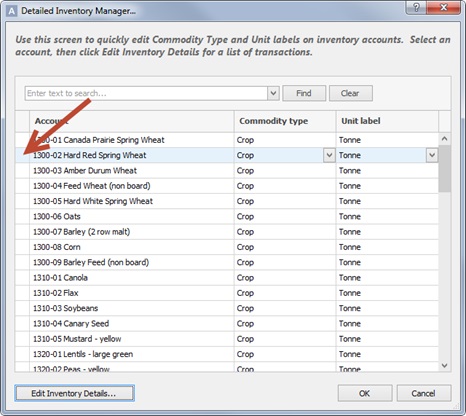
Select Detailed Inventory Manager from the Inventory menu. The Detailed Inventory Manager dialogue box will open.

The Detailed Inventory Manager displays all active inventory accounts in your chart of accounts and the associated Commodity type.
In this window, a warning icon is used to show if there is any details missing.
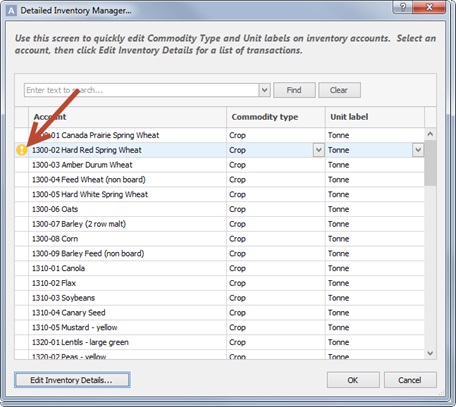
Click Edit Inventory Details to add the missing details.
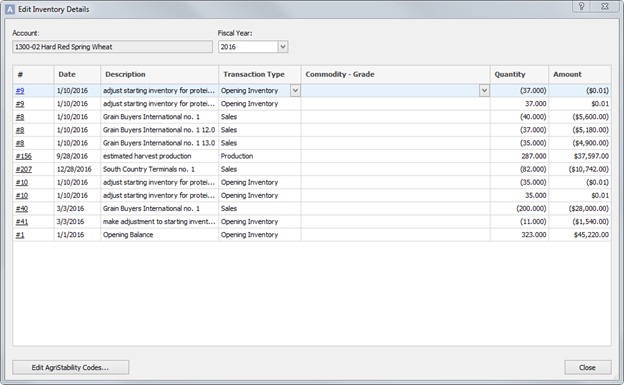
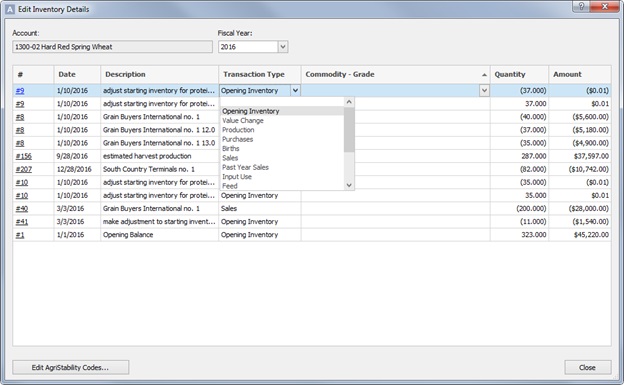
In the Edit Inventory Details screen, you will need to assign each line either a Transaction Type or a Commodity – Grade, depending on what is missing. The Transaction Type is a set list and cannot be modified.
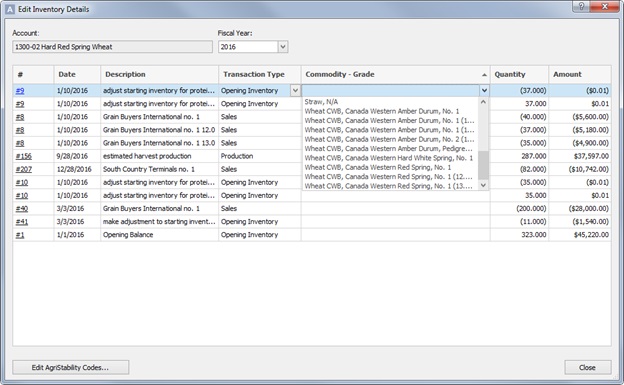
The Commodity – Grade list is based on what you have setup as AgriStability Codes.
Any lines that have been changed will be bolded. When you are finished adding your details, click Apply Changes.
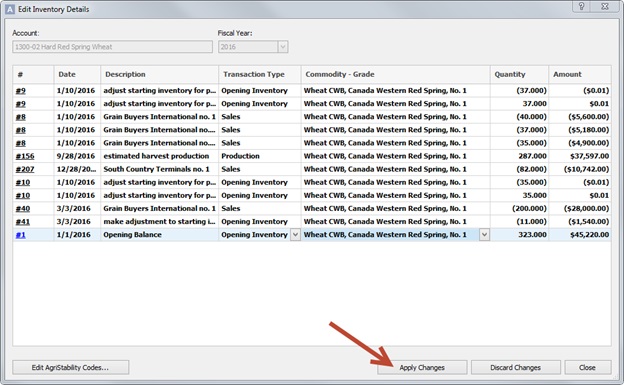
The lines will become a normal font as the changes have now been applied. Click Close and the warning icon will disappear from the inventory account.
If the warning still appears, then information is missing from prior years. Go back to Edit Inventory Details and change the fiscal year at the top of the screen.

Details from that specific year will appear and you can update the information as necessary. Remember to click Apply Changes once you are done.
Last updated on April 5, 2016 by FCC AgExpert